
第02篇:解耦就用Event
西魏陶渊明 ... 2022-9-4 大约 8 分钟
公众号: 西魏陶渊明
CSDN: https://springlearn.blog.csdn.net (opens new window)
天下代码一大抄, 抄来抄去有提高, 看你会抄不会抄!

# 一、前言
消息常用做解耦,这句话这样讲,可能大家没有什么体感。下面我们举一个实际开发中的例子,可能会更加帮助大家来理解。现在我们有这么一个系统。用户登录系统, 来完成产品下面给我们提的需求任务。通过完成任务的形式,来发现问题,最后再来解决问题。
# 1.1 自动签到
有一天,产品提了一个需求。在用户登录时候,要帮用户自动签到。于是我们代码这样写。
public boolean login(String userId,String password){
  // 登录成功处理逻辑
  if(doLogin(userId,password)){
    // 用户签到
    this.userSign(userId);
    return ture;
  }else{
    return false;
  }
}
1
2
3
4
5
6
7
8
9
10
2
3
4
5
6
7
8
9
10
# 1.2 满七天赠送金币

后来为了提高用户对APP的粘性,产品提了一个需求,当用户连续登录7天,可以增送金币。
ps: 这样看起来代码还行,但是需要知道的是,这只是伪代码,实际可能非常复杂。
public boolean login(String userId,String password){
  // 登录成功处理逻辑
  if(doLogin(userId,password)){
    // 用户签到
    this.userSign(userId);
    // 查询用户登录次数
    int signCount = queryUserSignCount(userId);
    // 连续登录7天,赠送7个金币
    if(signCount >= 7){
       sendGiftToUser(userId,7L);
    }
    return ture;
  }else{
    return false;
  }
}
1
2
3
4
5
6
7
8
9
10
11
12
13
14
15
16
2
3
4
5
6
7
8
9
10
11
12
13
14
15
16
# 1.3 自动领取徽章
后台有一天产品又说,当用户连续登录了14天,自动领取徽章。哎这个怎么有点像CSDN呢?
soga...
public boolean login(String userId,String password){
  // 登录成功处理逻辑
  if(doLogin(userId,password)){
    // 用户签到
    this.userSign(userId);
    // 查询用户登录次数
    int signCount = queryUserSignCount(userId);
    // 连续登录7天,赠送7个金币
    if(signCount >= 7){
       sendGiftToUser(userId,7L);
    }else if(signCount >= 14){
       // 连续登录14天,自动发放徽章
       sendBadgeToUser(userId);
    }
    return ture;
  }else{
    return false;
  }
}
1
2
3
4
5
6
7
8
9
10
11
12
13
14
15
16
17
18
19
2
3
4
5
6
7
8
9
10
11
12
13
14
15
16
17
18
19
这里我们思考一下,我们明明是一个用户登录系统,为什么还要给用户发礼品,关心用户签到? 这不是应该是 营销团队关心的事情吗? login就是一个登录方法,为什么代码越写越多了? 于是乎我们开始进行第一次解耦了。将签到和赠送礼品的逻辑都拆解出营销的模块。
# 1.4 营销业务解耦
将原本属于用户营销的业务解耦到一个模块或者是拆解出微服务。于是乎代码就是这样, 以后再有用户营销的业务,终于不用写在用户登录的方法里面了。login(...)。应该能坚持几个月了吧。
public class UserMarketingService{

    public void userMarketing(String userId){
      // 用户签到
      this.userSign(userId,password);
      // 查询用户登录次数
      int signCount = queryUserSignCount(userId);
      // 连续登录7天,赠送7个金币
      if(signCount >= 7){
         sendGiftToUser(userId,7L);
      }else if(signCount >= 14){
         // 连续登录14天,自动发放徽章
         sendBadgeToUser(userId);
      }
    }
}

public boolean login(String userId,String password){
  // 登录成功处理逻辑
  if(doLogin(userId,password)){
    userMarketingService.userMarketing(userId);
    return ture;
  }else{
    return false;
  }
}

// 营销处理逻辑
public class UserMarketingListener implements ApplicationListener<UserLoginEvent> {

    @Override
    public void onApplicationEvent(UserLoginEvent event) {
        // 用户签到
      Long userId = event.getUser().getId();
      this.userSign(userId);
      // 查询用户登录次数
      int signCount = queryUserSignCount(userId);
      // 连续登录7天,赠送7个金币
      if(signCount >= 7){
         sendGiftToUser(userId,7L);
      }else if(signCount >= 14){
         // 连续登录14天,自动发放徽章
         sendBadgeToUser(userId);
      }
    }
}

// 风控处理逻辑
public class UserSafeRiskListener implements ApplicationListener<UserLoginEvent> {

    @Override
    public void onApplicationEvent(UserLoginEvent event) {
       // 处理风控业务
    }
}
1
2
3
4
5
6
7
8
9
10
11
12
13
14
15
16
17
18
19
20
21
22
23
24
25
26
27
28
29
30
31
32
33
34
35
36
37
38
39
40
41
42
43
44
45
46
47
48
49
50
51
52
53
54
55
2
3
4
5
6
7
8
9
10
11
12
13
14
15
16
17
18
19
20
21
22
23
24
25
26
27
28
29
30
31
32
33
34
35
36
37
38
39
40
41
42
43
44
45
46
47
48
49
50
51
52
53
54
55
# 1.5 用户登录风控升级
用户登录终于跟营销解耦,现在又来了新的挑战,随着我们APP的用户的增长,用户的数据安全越来越重要了。这个时候我们开始搭建了我们的风险控制部门。
- 解决这些风险问题: 用户密码盗用,异地登录,频繁换设备登录等造成的安全措施。
产品提了一个新的需求,在登录的时候,将用户信息发送给风控部门进行检查,一旦检测部通过,自动下线,冻结用户账号。
于是乎我们又要开始动我们的login方法了。像这种情况还有很多很多,都需要再我们登录成功的时候,去处理一些信息。但是我们分析下,我们还有其他办法吗?
当然有就是通过事件去解耦。我们只定义一个登录成功事件,谁想关心登录成功,想做点事情,就去订阅这个事件就行了。一劳永逸。登录就只干登录的事情就行了。谁想干什么事情,谁就自己去订阅。如下代码示例。
// 定义登录事件
public class UserLoginEvent extends ApplicationEvent {

    // 登录用户
    User loginUser;
    // 用户登录成功或者失败
    boolean loginFlag;

    public UserLoginEvent(User login, boolean loginFlag) {
        super(login);
        this.loginUser = login;
        this.loginFlag = loginFlag;
    }
}

public boolean login(String userId,String password){
  // 登录成功处理逻辑
  if(doLogin(userId,password)){
    applicationEventPublisher.publishEvent(new UserLoginEvent(userInfo,true))
    return ture;
  }else{
    // 登录失败发送失败事件
    applicationEventPublisher.publishEvent(new UserLoginEvent(null,true))
    return false;
  }
}
1
2
3
4
5
6
7
8
9
10
11
12
13
14
15
16
17
18
19
20
21
22
23
24
25
26
27
28
2
3
4
5
6
7
8
9
10
11
12
13
14
15
16
17
18
19
20
21
22
23
24
25
26
27
28
好了,前戏我们铺垫完了,下面来学习Spring中给我们提供的事件管理机制。
# 二、内置标准事件
什么是内置的标准事件? 其实就是Spring中自定义的事件,告诉你当前容器的状态,允许你做点自己的事情。 哎? 这不也是解耦吗?
这部分内容前面已经说过了。
| 事件 | 解释 |
|---|---|
ContextRefreshedEvent | 在初始化或刷新时发布ApplicationContext(例如,通过使用接口refresh()上的方法ConfigurableApplicationContext)。这里,“初始化”意味着所有 bean 都已加载,后处理器 bean 被检测并激活,单例被预实例化,并且ApplicationContext对象已准备好使用。只要上下文没有关闭,就可以多次触发刷新,前提是所选择的ApplicationContext实际支持这种“热”刷新。例如,XmlWebApplicationContext支持热刷新,但 GenericApplicationContext不支持。 |
ContextStartedEvent | 使用接口上的方法 ApplicationContext启动时发布。在这里,“已启动”意味着所有 bean 都接收到一个明确的启动信号。通常,此信号用于在显式停止后重新启动 bean,但它也可用于启动尚未配置为自动启动的组件(例如,尚未在初始化时启动的组件)。start()``ConfigurableApplicationContext``Lifecycle |
ContextStoppedEvent | 使用接口上的方法 ApplicationContext停止时发布。在这里,“停止”意味着所有 的 bean 都会收到一个明确的停止信号。可以通过 调用重新启动已停止的上下文。stop()``ConfigurableApplicationContext``Lifecycle``start() |
ContextClosedEvent | 在ApplicationContext使用接口close()上的方法ConfigurableApplicationContext或通过 JVM 关闭挂钩关闭时发布。在这里,“关闭”意味着所有的单例 bean 都将被销毁。一旦上下文关闭,它就到了生命的尽头,无法刷新或重新启动。 |
RequestHandledEvent | 一个特定于 Web 的事件,告诉所有 bean 一个 HTTP 请求已得到服务。此事件在请求完成后发布。此事件仅适用于使用 Spring 的 Web 应用程序DispatcherServlet。 |
ServletRequestHandledEvent | 它的子类RequestHandledEvent添加了 Servlet 特定的上下文信息。 |
想了解更多的话,可以参考前一篇文章。下面来说我们如何自定事件。
# 三、自定义事件
# 3.1 自定义事件
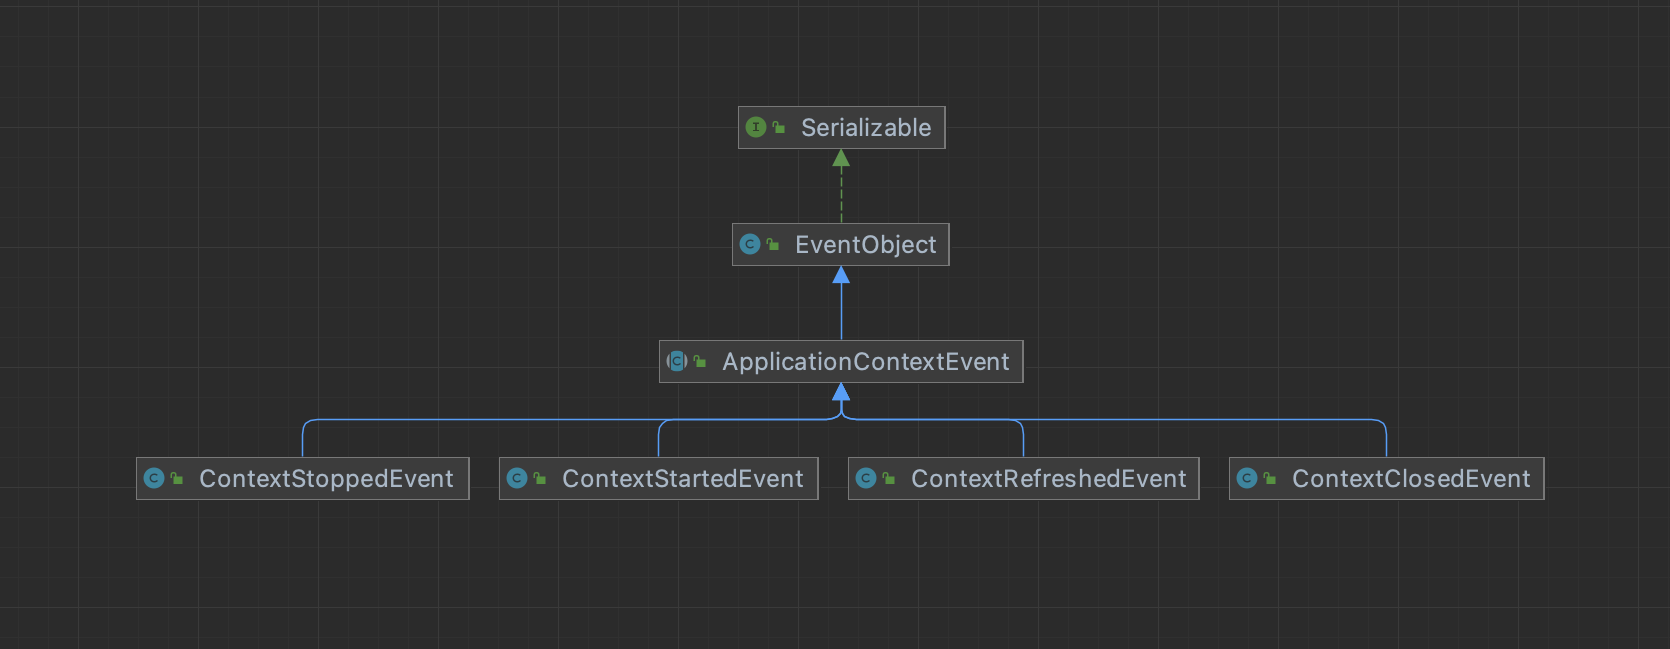
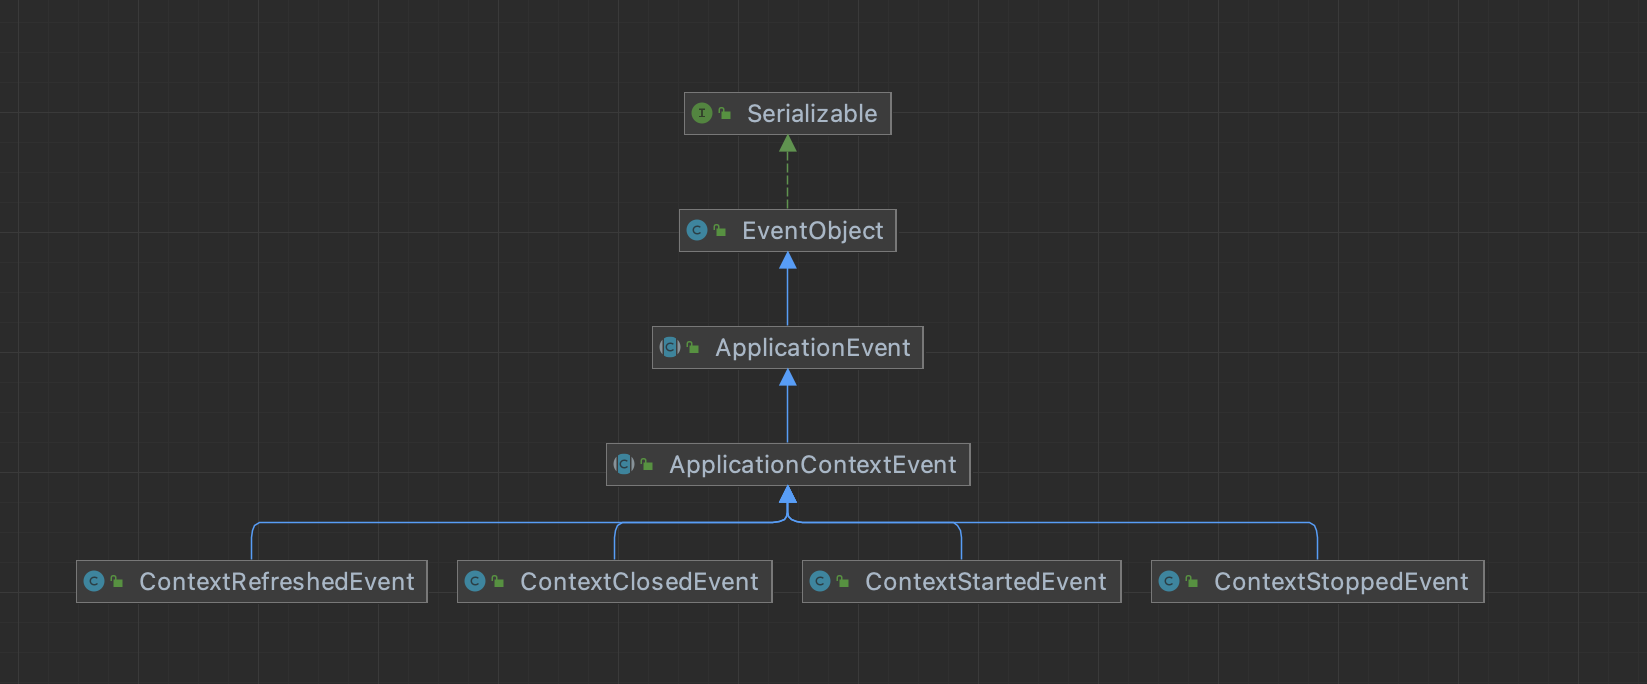
这张图是内置事件的继承管理,下面我们看下他的结构关系。
public class EventObject implements java.io.Serializable {
    private static final long serialVersionUID = 5516075349620653480L;
    protected transient Object  source;
    public EventObject(Object source) {
        if (source == null)
            throw new IllegalArgumentException("null source");
        this.source = source;
    }
}

public abstract class ApplicationEvent extends EventObject {
	/** use serialVersionUID from Spring 1.2 for interoperability. */
	private static final long serialVersionUID = 7099057708183571937L;
	/** System time when the event happened. */
	private final long timestamp;
	public ApplicationEvent(Object source) {
		super(source);
		this.timestamp = System.currentTimeMillis();
	}
}

public abstract class ApplicationContextEvent extends ApplicationEvent {
	public ApplicationContextEvent(ApplicationContext source) {
		super(source);
	}
	public final ApplicationContext getApplicationContext() {
		return (ApplicationContext) getSource();
	}
}
1
2
3
4
5
6
7
8
9
10
11
12
13
14
15
16
17
18
19
20
21
22
23
24
25
26
27
28
29
2
3
4
5
6
7
8
9
10
11
12
13
14
15
16
17
18
19
20
21
22
23
24
25
26
27
28
29
- EventObject 是jdk提供给的事件对象
- ApplicationEvent 继承了jdk事件对象,扩展了一个时间戳。
- ApplicationContextEvent 继承了ApplicationEvent,事件对象是容器上下文。
而我们要想自定义事件,只需要继承抽象类 ApplicationEvent 就行了,然后给事件,定义一个你要传递的信息,如下定义了一个用户登录事件。
public class UserLoginEvent extends ApplicationEvent {

    // 登录用户
    User loginUser;
    // 用户登录成功或者失败
    boolean loginFlag;

    public UserLoginEvent(User login, boolean loginFlag) {
        super(login);
        this.loginUser = login;
        this.loginFlag = loginFlag;
    }
}
1
2
3
4
5
6
7
8
9
10
11
12
13
2
3
4
5
6
7
8
9
10
11
12
13
# 3.2 定义事件监听器的两种方法
# 3.2.1 实现 ApplicationListener 接口
ApplicationListener<E extends ApplicationEvent> extends EventListener泛型限定必须是 ApplicationEvent子类。
@Component
public class UserMarketingListener implements ApplicationListener<UserLoginEvent> {

    @Override
    public void onApplicationEvent(UserLoginEvent event) {
        System.out.println("UserMarketingListener Processor:" + event);
    }
}
1
2
3
4
5
6
7
8
9
2
3
4
5
6
7
8
9
# 3.2.2 @EventListener 注解实现
我们也可以不实现 ApplicationListener 接口,我们使用 @EventListener.
@Component
public class UserSafeRiskListener {

    @EventListener({UserLoginEvent.class})
    public void userRiskEvent(UserLoginEvent userLoginEvent) {
        System.out.println("UserSafeRiskListener Processor:" + userLoginEvent);
    }
}
1
2
3
4
5
6
7
8
2
3
4
5
6
7
8
# 3.3 异步事件
# 3.3.1 自定义异步事件发射器
注意名称一定要是: applicationEventMulticaster
@Configuration
public class AsynApplicationEventPushConfig {

    @Bean("applicationEventMulticaster")
    public SimpleApplicationEventMulticaster applicationEventMulticaster(BeanFactory beanFactory) {
        SimpleApplicationEventMulticaster simpleApplicationEventMulticaster = new SimpleApplicationEventMulticaster(beanFactory);
        // 设置为异步处理
        simpleApplicationEventMulticaster.setTaskExecutor(new SimpleAsyncTaskExecutor());
        // 统一的异常处理器
        simpleApplicationEventMulticaster.setErrorHandler(new ErrorHandler() {
            @Override
            public void handleError(Throwable t) {
                System.out.println("事件处理异常:" + t);
            }
        });
        return simpleApplicationEventMulticaster;
    }
}
1
2
3
4
5
6
7
8
9
10
11
12
13
14
15
16
17
18
2
3
4
5
6
7
8
9
10
11
12
13
14
15
16
17
18
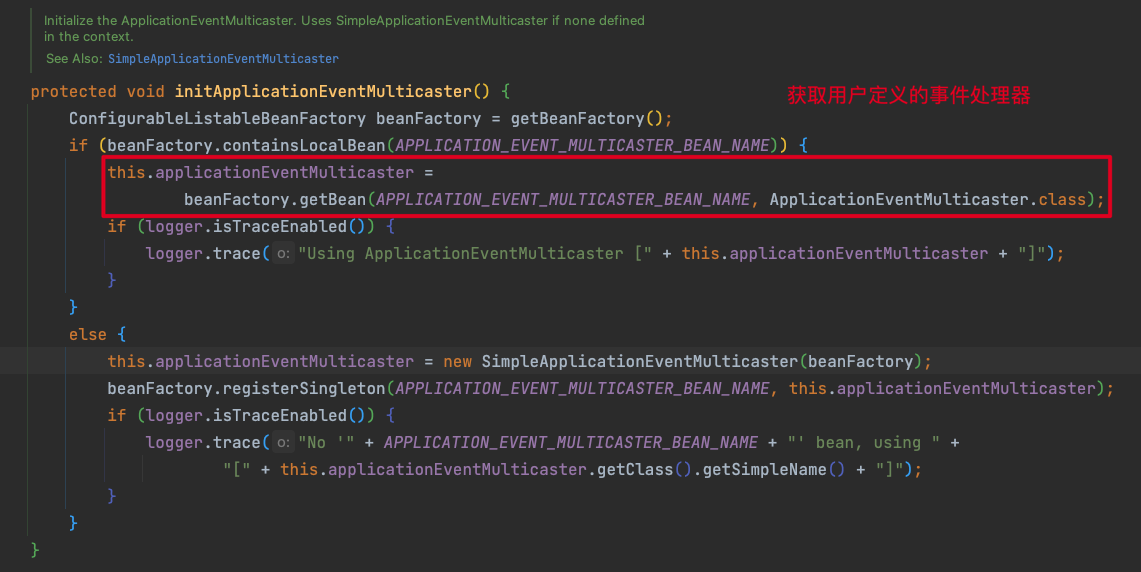
想研究源码的,可以看下这里。
AbstractApplicationContext#initApplicationEventMulticaster
# 3.3.2 注意事项
SimpleApplicationEventMulticaster#TaskExecutor
默认相当于
org.springframework.core.task.SyncTaskExecutor,即在调用线程中同步执行所有监听器。当然如果要用异步,你需要使用
org.springframework.core.task.SimpleAsyncTaskExecutor需要注意的是,如果使用异步,发送事件不会阻塞调用线程。但是,请注意异步执行不会参与调用者的线程上下文(类加载器、事务关联)
# 3.4 最后发送事件
    public static void main(String[] args) {
        ConfigurableApplicationContext run = SpringApplication.run(Application.class, args);
        // 同步还是异步,取决于配置。
        run.publishEvent(new UserLoginEvent(new User(),true));
    }
1
2
3
4
5
2
3
4
5

最后,都看到这里了,最后如果这篇文章,对你有所帮助,请点个关注,交个朋友。